| 1)
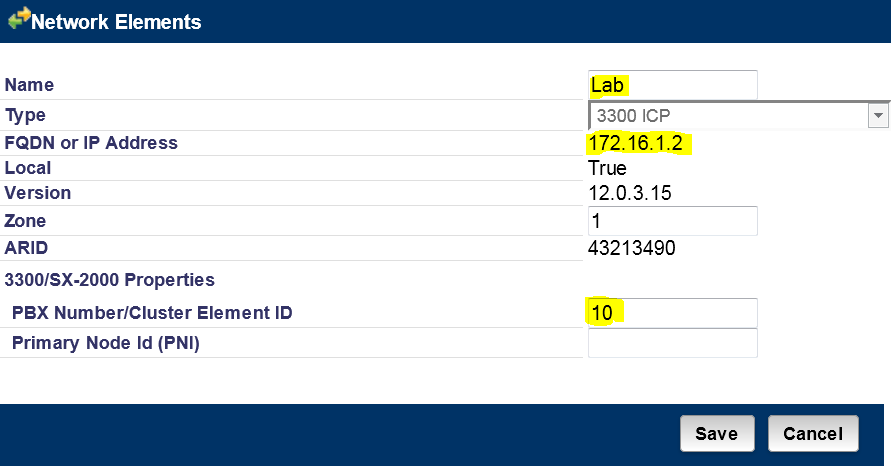
Network Elements
This Network Element will be/is your local PBX. Note: if this 3300
is already in a cluster then these fields are already filled in.
-
Assign a Name
-
Select type of
“3300 ICP”
-
Enter the IP
address of the local PBX. (The one you're logged in to.)
-
Enter a PBX
Number/Cluster Element ID
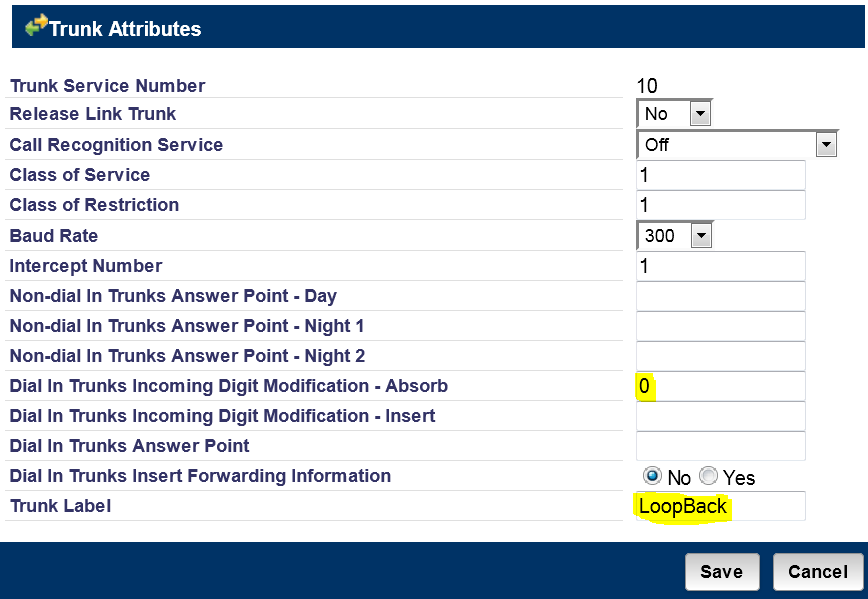
2) Trunk Attributes
Edit an unused Trunk Service Number. This TSN will be
assigned to your new loopback trunk.
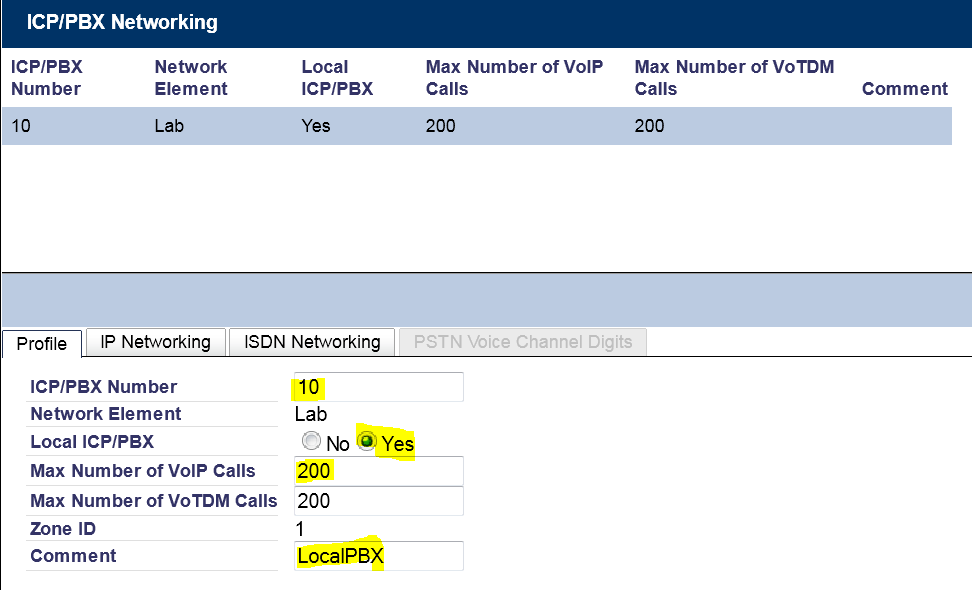
3) ICP/PBX Networking
-
Enter the ICP/PBX Number. It is recommended that you use
the same number as the Cluster Element ID number used in step 1.
-
Select YES for the “Local ICP/PBX” entry.
-
In the “Max Number of VoIP Calls” field enter a number
greater than the expected number of active calls. Maximum is
2000.
-
For Clarity, in the “Comment” field enter “LocalPBX”.
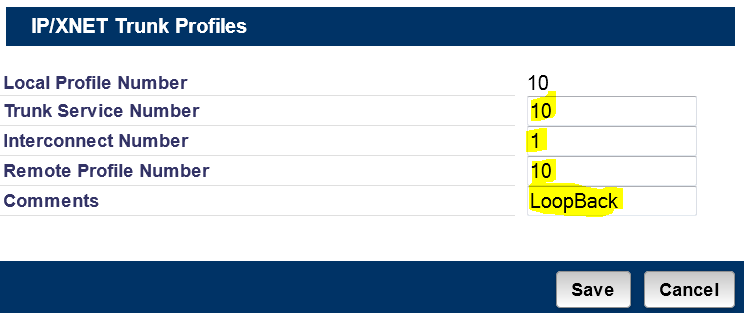
4) IP/XNET Trunk Profiles
Create a new IP/XNET Trunk Profile.
-
In the “Trunk Service Number” field enter the TSN created
in step 2.
-
In the “Interconnect Number” field enter the number “1”.
-
In the “Remote Profile Number” field enter the exact same
number as the Local Profile Number.
This must match.
-
In the “Comments” field enter “LoopBack”
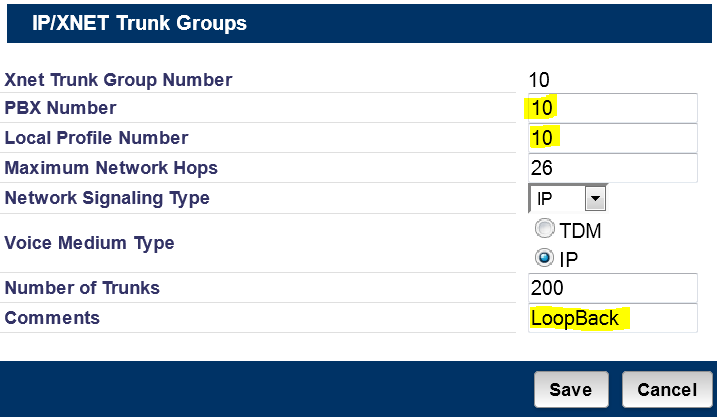
5) IP/XNET Trunk Groups
Create a new IP/XNET Trunk Group by selecting an
unused entry.
-
In the “PBX Number” field, enter the PBX Number created
in step 1.
-
In the “Local Profile Number” enter the LPN created in
step 4.
-
In the “Comments” field enter “LoopBack”.
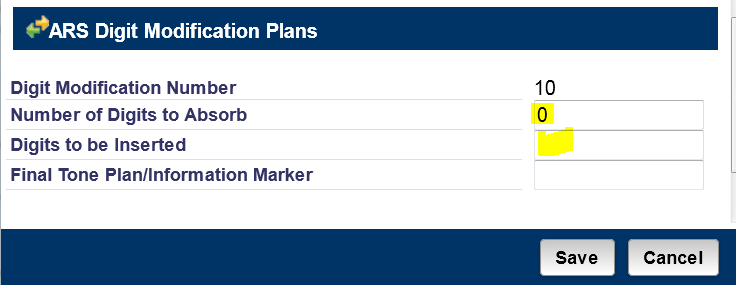
6) ARS Digit Modification Plan
Select an unused Digit Modification Plan. The entries
made here regarding the “Number of Digits to Absorb” and the
“Digits to be Inserted” will be specific to your own
applications. For our example we will not be absorbing or inserting
any digits.
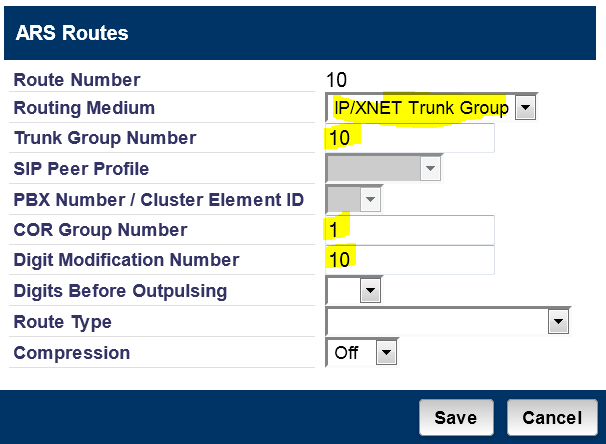
7) ARS Routes
Create a new ARS Route.
-
Select an unused ARS Route.
-
In the “Routing Medium” field select “IP/XNET Trunk Group”.
-
In the “Trunk Group Number” field enter the IP/XNET Trunk Group
created in step 5.
-
In the “COR Group Number” field enter the number '1'. This
should be unrestricted.
-
In the “Digit Modification Number” field enter the Digit Mod
Number created in step 6.
8) ARS Digits Dialed
Your new loopback trunk is now available and ready to
use. You may now point ARS digits dialed to your new loopback route.
Note: for this How-To we did not absorb or insert any digits in the
digit modification table. It is is expected that you will need to in
order for your application to work.
Click Here For the Mitel Forum
Related Forum Post
Please join our forum and follow our
newsletter. Your participation may help others. If you've
found this article useful please
|